Posts

Showing posts from October, 2023

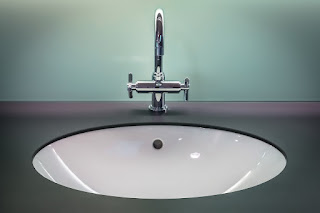
Changing the hot and cold water on a single-lever mixer tap

Image
 With conventional taps, the knob to the right of the spout controls the cold water and the knob to the left controls the hot water. With a single-lever mixer, the hot and cold water are controlled with the same handle. Sliding the handle to the right controls the cold water, and sliding it to the left controls the hot water. Both types of taps, however, are fed by two supply pipes located under the washbasin. Switching from hot to cold water is a simple task that requires only basic plumbing skills. You can also adjust the mix of hot and cold water that the tap dispenses. Switching water pipes These are chrome-coloured knobs on the back wall under the sink with a thin plastic or metal tube running up to the tap. Turn each knob anticlockwise to turn off the water supply . Turn on the tap to make sure that the water supply is turned off before removing the supply lines. Loosen the supply pipes by turning the nut securing the supply pipe to the shut-off valve anticlockwise with a spanner

Setting a toilet float

Image
  For a perfect flush, you need a functioning toilet float. A toilet float is a small device that ensures that the toilet bowl fills with water without overflowing. This small device, sometimes called a ball valve, can become misaligned from time to time, leaving you in a predicament. If you are not getting the right amount of water into your toilet bowl (too much or too little) or the toilet sounds like it is constantly running, check your toilet float. It may be that the float needs to be adjusted. It is relatively easy to know how to adjust the float. Before you call a plumber or flood your bathroom, check your toilet float and see if you can adjust it yourself.  Remove the tank lid First, remove the toilet tank lid, which is the large cap that sits on the back of the toilet. Next you need to identify the float in the tank. Every toilet looks a little different, but usually the floats are easy to identify. Your toilet float should look like a ball floating on the water in the tank.

How to repair a tap on the outside of the house

Image
  If you look forward to gardening every spring, you need to know how to care for your old outdoor water taps to keep them working well. Salty sea breezes and cold temperatures can wear down valve seals and corrode metal parts. The results can be dripping, rusty outdoor faucet handles that won't turn, or splashing from the handle when the faucet is turned on. Another possibility is that the outside tap turns constantly or cannot be turned off. Outside taps or spigots use pressure valves and are among the easiest taps to repair. All you need are a few tools, a little muscle power and some inexpensive replacement parts. Evaluate the old parts of the outdoor tap Analyse the problem before you embark on an outdoor tap repair . If the tap is dripping, you will probably need to disassemble it. If the tap is leaking where it connects to the water pipe, you may be able to fix the leak by tightening the tap. Also, you can often stop water spraying out of the handle by tightening the bush th

Loud howling when the toilet tank fills up again

Image
  A howling noise when filling the toilet tank may be due to something simple, such as a partially closed valve. However, often the problem is that one or more parts of the ball valve need to be cleaned or replaced. To determine the cause of the howling, you must first make the simplest repairs before replacing the entire assembly . Toilet tank assemblies Inside your toilet tank are two assemblies: the ball valve and the flush valve. The ball valve controls the water fill in the tank, and the flush valve controls the flow of water from the tank to the bowl. When you flush the toilet, the lever or arm lifts the chain or wire attached to the flapper. When the flap lifts, the water is directed through the valve seat into the basin. Once the tank is empty, the plug falls back over the opening in the tank and the float ball releases the ball valve, allowing new water to flow through the tank filling pipe. Blockage or damage to the ball valve will obstruct the flow of water and cause a loud

How to remove old drain pipes in the wall

Image
  If you are removing a sink in the kitchen , bathroom or laundry room, you will need to disconnect the drain from the waste pipe. Unless you are planning a new sink, you will probably want to remove it and patch the wall. When you open up the wall, you will probably find that the stub has vertical connections to the basement drain and the roof. If you can find these pipes in the attic or crawl space, it is possible to cut them off and remove them. If you cannot find them, it is probably better to seal the pipes behind the wall. Locate the studs on either side of the drain stub you want to remove with a stud finder. Using a box cutter and a wall saw, cut a rectangular piece of drywall that extends at least to the sides of these studs and about three feet above the drain stub to the floor. Cut through the drywall in the middle of the stud faces so that you have access to wood to which you can attach the new drywall. Using a hacksaw, cut the PVC pipe anywhere in the wall that will allow

How to unclog a shower or bath drain

Image
  A blocked bathtub or shower drain is one of the most common problems you face when using your bathroom on a daily basis. Even if the water is slow to drain, over time this leads to a slippery build-up of soap scum, dirt and grime on the bottom of the bath or shower tray, which can be unsightly or even dangerous. Regardless of what form your troublesome clog has taken, it needs to be dealt with. Fortunately, it's usually not too difficult to fix a bathtub or shower clog yourself, so you don't have to call a plumber right away. There are a number of DIY methods you can try to clear the blockage.   Removing the blockage by hand The first step is to take a look at what is causing the blockage. Remove the chrome cover of your drain by lifting or unscrewing it (whichever is appropriate for your type of drain), or pull out the plug if it's an old style with a plug and chain. The culprit is usually a build-up of hair and soap residue. If you discover hair on the bottom of the dr

Replacing a dryer socket

Image
 Dryers require a special dryer socket to function properly. This outlet is designed to provide both 240 volt and 110 volt power to the dryer. The dryer needs the 240 volt supply to heat up, while the 110 volt supply is used to control the timers in the dryer. Over time, sockets can become damaged or simply stop working, for a variety of reasons. There is no point in trying to repair these sockets as they are very cheap to replace for safety reasons . Switch off the power Before you start working on your home's electrics, make sure you switch off the power. If the power is left on, this work can be very dangerous. Either turn off the circuit breaker for that circuit or, if you are not sure which circuit breaker to remove, turn off all the power in your home. Remove the old socket The old socket must now be removed from the wall by unscrewing the two screws that hold the faceplate. Once these screws are removed, it should be possible to pull the socket out of the electrical box. Be

Repair your leaking one-hand shower fitting

Image
  A single-handle shower mixer has one handle for hot and cold water, rather than the usual two. These taps are usually found in modernised, remodelled or new bathrooms. Repairing a single-handle faucet is not much different from repairing a faucet with two handles. Usually, a leaking tap is due to a worn O-ring, a small rubber ring that ensures that the seal between the shower cartridge and the pipes is tight. Remember that this is a challenging task for someone who is not familiar with this work. Remove the fitting Turn off the water. If you cannot do this from the shower, you will need to locate the tap on the main pipes of your house. Then close the shower drain so that no parts fall down. Most taps have a plastic or metal cover plate that needs to be removed. Break it off with a knife or screwdriver to expose a small screw. Remove this screw and carefully set the parts aside. You may also need to remove the bezel around your light. Simply detach this part from the wall. If it is

Red flags for plumbing installations to consider when buying a new home

Image
  Stuttering tap If your tap stutters when you turn it on, it's most likely due to air in the pipes. If this only happens every now and then, it's usually fine, but if it's persistent, it could be an indication of something more serious. For example, a sputtering tap can be a sign that your water heater is overheating. Stains on walls and ceilings A clear warning sign is stains on walls or ceilings. Stains are often the result of a leak, which could be from the roof or a leaking pipe , so it's important to find out the cause of the stain. If you are lucky, the stain could be from a previous problem that has since been fixed.  Also look out for random stains with fresh or peeling paint - some homeowners quickly paint over a stain to hide it rather than remove it. Weak water pressure When inspecting a home, always turn on the taps to check the water pressure. If the water pressure is too low, it may be a sign of a problem with the plumbing. Low water pressure is often cau

Replacing a bath tap with diverter lever

Image
  A bath faucet diverter is a small flap behind the handle of your bath faucet that determines whether water flows from the shower or the bath faucet. With a single-lever faucet, you will probably need to push or pull the shower faucet handle to divert the water. With a three-handle bath mixer, the middle handle controls the diverter. If you want to replace the diverter on the bath mixer, you will need to access the pipes behind the shower mixer handle. Remove the existing cartridge First, close the shower tray so that no parts of the shower can fall down the drain. You can place a towel over the drain to do this. Next, remove the handle above the shaft of the shower fitting. Remove the screw and pull the handle off. You need to turn off the water by turning the shut-off screws for cold and hot water. Finally, remove the nut that holds the cartridge in place. You should do this with soft pliers so as not to damage the soft copper that is normally used for the pipes. Pull the cartridge

Wiring and fuses in older houses

Image
  Knob and tube wiring Knob-and-tube wiring was an innovative way of wiring houses in the pre-1930s. Essentially, wires are run through the rafters, usually along the centre beam, and held in place by porcelain knobs. When wires needed to be connected to knobs and pipes, they were soldered together to make a permanent connection. The porcelain knobs are usually placed at a distance of 15 cm from the joint to avoid stressing the wires. The only insulation that protects the wire is the insulation of the wire itself. There is no plastic sheathing surrounding the wires, as is the case in modern applications. One of the main reasons for using knobs and tubes is that the neutral wire is normally the wire that is turned off and on in a switch. This means that although voltage still flows through the wires, the circuit is not complete. I call button tube "innovative" because the wires actually pass through open spaces and are not stapled to plates. The free-space aspect results in

What's wrong with your toilet when you hear water running in your tank

Image
  If you hear water running in the tank after filling the toilet, it's a symptom of a costly problem. It means that water is leaking from the tank, which will drive up your water bill. To fix the problem, all you have to do is invest a little time and maybe buy a new part. Baffle plate The flapper is the large rubber or soft plastic valve located at the bottom of the tank. When the flapper is closed, it prevents water from flowing out of the tank into the bowl . When you flush the toilet, the flap opens and lets water run into the bowl. Over time, the material hardens and the flap loses its flexibility. If the water is hard, the flapper may also be encrusted with a film of minerals. Replace an aged or damaged flapper with one made for your toilet model or fit a universal valve. Most flaps come off the ears that attach them to the overflow pipe. Chain Check the chain that connects the flapper to the handle you use to flush the toilet. If there is too much slack in the chain, it can

How to repair a tap

Image
  Waterfall taps are becoming increasingly common in homes. All types of taps have a similar design where the spout leads to a round or elongated disc-shaped structure. This directs the water flowing from the spout along the disc, from which it drips down like a waterfall. The spouts are modified to control the water flow more precisely and distribute the water evenly to both sides of the washbasin. Waterfall taps are used in bathroom and kitchen sinks . They are durable plumbing designs. However, with careless handling and prolonged use, they can develop problems such as leaks. Waterfall taps can be easily repaired with some basic tools and the following guidelines. Dismantle the tap handle Turn off the water supply to the sink. The main water valves are usually located under the sink. If you cannot find them, turn off the water supply to the house. Unlike conventional taps, waterfall taps do not usually have a large cap on the handle. The handle cover is in the shape of a thin plate,

Installation of a Clog-free toilet

Image
  We have enough to do in our daily lives without also having to worry about a clogged toilet. Clogs in the bathroom are no fun. Fortunately, clever minds have developed toilets that clog much less frequently. This saves you the time and hassle of clogging the toilet or endlessly using the plunger to deal with this unpleasant task. Choose a toilet Clog-free toilets come in different sizes and shapes to suit your needs. Choose whether you prefer oval or round, tall or regular, almond-shaped or white. You also have to choose between a one-piece and a two-piece model, each of which has its advantages and disadvantages. If you are planning to install a seat or toilet raiser, now is also the right time to do so. Consider whether the toilet you are considering will fit into the space available. Believe it or not, toilets actually have different functions. Of course, opt for a clog-free toilet, but there are also toilets with cleaning functions, or more precisely, cleaning-avoidance function

Resetting a circuit breaker

Image
  Switch off the fixtures The first thing you need to do is switch off all lighting fixtures and unplug any appliances that may have caused the problem. Then equip yourself with a torch to make sure you have enough light when working on the circuit breaker. Locate the electrical panel Locate the electrical panel, which should be where the electricity comes into your house (e.g. in the entrance, garage or basement). The panel has either a lock with a key or a plastic latch that needs to be opened. If you examine the circuit breaker , you will notice that the switches have three positions: ON (in the centre of the panel), OFF (at the edge of the panel) and a middle position. If the breaker is in the middle position, it has tripped and needs to be reset. Press the switch Slide the switch to the OFF position and then back to the ON position, towards the centre of the control panel. You will hear a click. If the switch remains in this position, you have successfully reset the circuit breake

How to install electrical wiring

Image
  Many DIY and remodelling projects require either new wiring or the replacement of old , worn-out or burnt-out connections. For extensive work, it is obviously best to hire an electrician, but some projects can be done by the average DIYer.  Wiring basics When working with wiring, always disconnect the power at the breaker box first before starting any actual work. Then check the surrounding area with a neon tester to make sure the power is off and you can proceed safely. Most wiring in a house is either 12-core or 14-core. When connecting existing wiring to an appliance or device, you usually follow the colour code by connecting each colour of wire to its corresponding twin. For example, light switches are operated with the black cable and connected directly to another black cable already in the system. Connecting to the socket As a rule, the wiring to be installed is connected to the last socket of the current cable run. You can determine this by looking for the socket whose wires a

Does the wiring of your home pose a fire hazard

Image
  As rapidly as the construction of houses and flats is evolving, a large percentage of homes still consist of old houses. Over the last century, the way electrical wiring is built and installed in homes has changed drastically. One of the dangers associated with owning an old home is that fires are more likely to occur due to electrical accidents caused by outdated electrical wiring. Below are some signs that your home's wiring is a fire hazard. Wiring with knobs and tubes This type of wiring uses white ceramic knobs to hold the wires in place and ceramic tubes to protect the wires. There are a number of problems that make this type of wiring particularly dangerous in your home. These include a lack of earth wires, the use of rubber that degrades over time, and the need to avoid contact with insulation. Most insurance companies do not insure homes using this type of wiring at all because of the high risk of fire. Companies that do charge very high premiums for it. Aluminium wiring

Repairing a leaky faucet for taps

Image
  One-handle kitchen faucets make food preparation and cleanup easier. With just one handle, you can get the water to the right temperature for your work with just one hand. You can't fix a leaky kitchen faucet with one hand, but this is a problem a homeowner can solve. Perhaps the most difficult part is finding the right replacement part for the cartridge. You may need to disassemble the faucet and take the damaged cartridge to a hardware or plumbing store to make sure you get the right part. Turn off the water supply to the kitchen faucet under the sink. If there is no supply valve, turn off the water supply throughout the house. Run the water out of the faucet to drain it. Place a plug in the sink to catch any parts that might slip out of your hand. Remove the decorative cap on top of the faucet by prying it off with the tip of a screwdriver to expose the screw that holds the handle in place. Some faucets have rubber plugs that cover an Allen screw on the bottom of the handle.

Plumbing in Bristol

Image
 Leaky faucet repair: tips to stop dripping If it won't stop dripping, you should take charge of repairing a leaky faucet yourself to save money. There are two basic types of faucets. One is a washer type, also known as a compression. The other is dishwasher-less. Both types of faucets are prone to leaks.  Defective washers are often the culprit. Washers can be replaced, but still won't seat properly to stop the dripping. The best solution for long-term prevention is to buy a faucet without a washer. Close the faucet tighter to temporarily stop the leak until you are ready to fix it. You may need a wrench or screwdriver to do this. You can stop the sound of dripping water by tying a long string around the end of the faucet. The water will then drip onto the string and run off quietly. This is not a solution to the problem, of course, but may help temporarily if the leaking faucet is in a hotel room or rental property. For a faucet with a washer, examine the stem. If the thread

Faucet handle replacement

Image
 When it comes to faucet handle replacement, it's not a particularly difficult task. The handle itself is only a small part of the faucet that you will be dealing with. You will find that faucet repair of any kind is usually a simple and straightforward task. Prepare The first thing you need to do is get under the sink to your cabinet. Clear out everything that is under your sink so that you have more space to work with. If you have a pedestal sink, you won't have to worry about this. Turn off the water Once you've cleaned out the contents under your sink, you can turn off the water. The hot and cold water supplies are located under the sink. They are much easier to find and reach if there isn't too much clutter in the way. However, if you can't find them, just turn off the main water source. Drain Get out your drain basin and place it under your faucet. Make sure it's below the plumbing so it can catch all the water. If you have a pedestal sink, use a thick to

Ways to remove a clogged drain pipe

Image
  A clogged drain line is something to be reckoned with because it happens all the time. Some of the most common causes of clogs include grease buildup and debris. Hair, solid objects, food, and many other types of debris can clog the drain. However, there are some ways to clear the clogged drain, and here they are. Using the plunger The plunger is a tried and true method that has been used for years. This tool is the first aid for any type of clog. It uses compressed air or water to push on whatever is clogging the drain. The plunger works best for clogged toilet bowls and other drains where the rubber head can fit. Use a plumber's snake or cable drill Use this flexible steel cable to remove debris from the drain. Simply take the tool by the hook and pull it out, which will clog the drain line. This process also requires some elbow grease. Simply insert the tool into the drain pipe and use it to find the clog. If there is resistance, it means it has hit something. Turn the handl

How to repair a leaky drain pipe of the kitchen sink

Image
  The kitchen is a frequently used space, which makes it a candidate for repairs when a sink drain pipe is clogged . The sink drain will be caught with various materials and components from cooking and washing activities that would trigger the eventual clogging of the pipes. The normal problem of clogging is easily solved unless a serious object has caused it, in which case the help of a plumber would be required to fix the problem. The kitchen sink drain consists of a few components such as the strainer, rubber gasket, metal washer, and a large lock nut that may need to be disassembled if the clog is severe. Initial inspection to detect leaks and blockages Set up a bucket to catch water leaking from the drain pipes. Thoroughly examine the drain basket, a type of filter that attaches to the sink opening, to determine if the drain is clogged to allow water to pass through. The cause of leaks is difficult to determine. The test to determine if there are leaks at the seal is to run water

Wiring of a luminaire with two switches

Image
 It is helpful to know how to wire a light fixture that is controlled by two switches instead of one. It's a little more complicated than simply wiring one switch at the end or in the middle of a circuit, mainly because there are more wires and connections involved. If at any time during the process you feel unsafe or fear that you are doing something wrong, you should stop and call an electrician . Laying cables Make sure the plastic control boxes and light box are all properly attached to the studs or joists and that the Romex cable is routed through them. A cable from the main power source should be run up inside the light box. There should be a 2-wire cable - a black, white and bare cable - between the light box and the first control box. For the distance between the first and the second control box, run 3-core Romex. This cable consists of three wires and a ground: red, black, white and bare. Each cable should protrude at least 15 cm from the box, so you have enough space to

How to repair a broken shutoff valve on the sink

Image
  The shut-off valves under your sink are your last line of defense when the faucet leaks, and they must always be in working order. Because they are rarely used under normal circumstances, the plastic and rubber parts inside such a valve can become brittle, and eventually it can leak. Before replacing a leaking valve , you can try a simple repair procedure. If it doesn't work, you'll have to replace the valve, but if it does work, you'll have saved a little time and money. Spray the handle with spray lubricant if it won't turn. Wait about five minutes and then try turning it again. Repeat the process if necessary. Stop a valve leak by tightening the packing nut. Wrap a rag around the nut located just below the valve handle, grasp it with adjustable pliers, and turn it clockwise one-eighth of a turn. This may compress the rubber and plastic inside enough to stop the leak. If not, disassemble the valve. Turn off the water in the sink. If you are repairing a hot water val

How to repair a crack in a siphon of the drain

Image
  It's relatively easy to fix a leaky sink trap without having to call in a plumber, which would also prove to be extremely costly. If you notice that water is gradually dripping onto the floor, then water is clearly leaking through a crack in the sink's trap. There could be two reasons why the water is dripping onto the floor: first, the connections between the traps could be loose, and second, the pipes could be cracked or clogged with debris, causing water to leak out. With some basic plumbing knowledge and a few plumbing tools, this task can easily be done yourself at home. This task should only take a few hours of your time. Turn off the water supply The first step is to shut off the water supply completely before trying to find the exact cause of the leak. To do this, simply turn off the shut-off valves that are located near the sink. This step is useful if you don't want the floor to be full of water. Check the connections of the trap The next step is to find out wh

Replacing the drain pipes of the kitchen sink

Image
  Remove existing pipes and drain Before you start cutting and removing the pipes , you should place a bucket under the drain of your sink. You should also let all the household members know that you are removing the drain pipes, or you should turn off the water so that no one floods the area. To begin the work, you will need to remove the existing drain pipes. To do this, cut the pipe below the trap. Once this connection is cut, you can unscrew the drain pipes from the bottom of the sink and remove all the piping. If you cut the bottom pipe, water will likely leak into the bucket. Clean and prepare the surfaces Use light sandpaper to remove any splinters or pieces of plastic left behind from the cutting process. The surface of the existing pipe must be smooth and free of debris in order to perform the bonding process. Also remove any tape from the threads under the sink. In most cases, you can use a rag with light soap to clean the connection areas and remove any contaminants. Inspect

Installation of a drain pipe for the kitchen sink with drain in the floor

Image
  When installing a drain pipe for a kitchen sink along with the drain attachment in the floor, you need to be able to assemble the drain and the parts together. To do this, you will need to attach the drain to the trap under the sink where it drops into the floor. To do this, you will need to apply putty and insert the drain into the bottom of the sink, attach the end piece, and then install the tee onto the bowl. Installing the sink drain is not too difficult, and you should be able to complete this job in a weekend if you follow some simple instructions. Adding the sink drains Start the installation by inserting the drain strainer into the bottom of the metal sink. Add the two washers that came with the drain strainer kit to the bottom of the drain strainer, then add the nut to hold it in place. Apply a small rim of putty to the strainer, then press it into the hole in the sink. You may also decide not to install the washers before installing the strainer, but instead screw them on