Posts

Showing posts with the label #plumber in Oldham

The Dangers of Ignoring Faulty Home Plumbing

Image
 Plumbing problems are easy to overlook, especially when they seem minor. A small leak under the sink or a slight discoloration on a wall may not seem like a big deal at first glance. But ignoring faulty pipes can lead to much more serious problems down the road, including costly repairs, structural damage, and serious health risks. Understanding what's at stake can help homeowners act quickly before a small problem turns into a full-blown emergency. Water Damage and Structural Problems Faulty pipes often leak behind walls, under floors, or above ceilings—places where you may not immediately notice. Over time, this hidden moisture can weaken drywall, rot woodwork, and damage floors. In more serious cases, it can compromise the structural integrity of the home. What starts as a small leak can cause sections of the ceiling to collapse or floorboards to buckle. Repairing this type of damage is expensive and time-consuming, especially when it comes to mold remediation. Mold Growth and ...

Why Your Boiler Keeps Cutting Out and What to Do About It

Image
 A boiler that keeps cutting out is more than just an annoyance: it's often a sign that something is wrong with your heating system. If your boiler starts and then cuts out shortly after, or cuts out frequently throughout the day, you're not alone. This is a common problem in many homes and can have a number of causes, some simple and some more serious. One of the most common causes is low water pressure. Boilers require a certain amount of pressure to work efficiently. If the pressure drops too low, the boiler's safety mechanism may trigger the boiler to shut down to prevent damage. You can check the pressure gauge on your boiler: it should usually show a pressure of between 1 and 2 bar. If it's too low, repressurising the system may solve the problem. However, if the pressure keeps dropping, it could indicate a hidden leak or a faulty safety valve. Another common cause is a problem with the thermostat or timer. If your thermostat isn't communicating properly with ...

Bathroom Mold and Plumbing Leaks: What's the Connection?

Image
 Bathroom mold is a common problem that many homeowners face, but its presence often signals a deeper issue: hidden plumbing leaks. While surface moisture in showers and bathtubs can contribute to mold growth, persistent or widespread mold is often a warning sign that water is leaking into unwanted places. Understanding the connection between bathroom mold and plumbing leaks is essential to protecting your home and your health. Bathrooms are naturally humid environments, and without proper ventilation, condensation can collect on walls, ceilings, and fixtures. However, when mold begins to appear in unusual areas, such as under sinks, behind toilets, or near baseboards, it could indicate a slow or hidden leak behind the walls or under the floor. These leaks provide a constant source of moisture, creating the perfect breeding ground for mold to grow unnoticed. One of the dangers of hidden plumbing leaks is that they often go unnoticed until mold becomes visible or you notice a musty ...

Quick Plumbing Checks You Can Do in 10 Minutes

Image
 You don’t need to be a plumber—or spend hours on home repairs—to keep your plumbing in good shape. Just 10 minutes is enough to handle a few simple tasks that can prevent expensive problems later on. Look for Leaks Under Sinks Take a peek under your kitchen and bathroom sinks. Check around the pipes for any signs of water, rust, or stains. Turn on the faucet and let it run for a minute while you inspect the pipes. Even small drips can lead to bigger issues like water damage or mold. Clean Faucet Aerators Noticing weak water flow or a spray that’s all over the place? Your faucet’s aerator could be gunked up with mineral buildup. Unscrew it from the tip of the faucet and soak it in vinegar for a few minutes. Then, scrub away any debris with an old toothbrush before putting it back on. This quick fix can make a big difference in water flow. Test Your Toilet for Leaks To find hidden toilet leaks, add a few drops of food coloring to the tank—just don’t flush. Wait 10 minutes. If the co...

Why Does My Toilet Gurgling? 6 Possible Causes and Solutions

Image
 If your toilet is making strange gurgling or gurgle noises, it’s not just annoying—it could be a sign of a deeper plumbing problem. A gurgling toilet usually means there’s negative pressure in the plumbing, which pushes air up through the water in the bowl. Ignoring this could lead to more serious problems like slow flushes, back-up, or even sewer line damage. Let’s explore these common reasons why your toilet might be gurgling and what you can do to fix it. Clogged Drain One of the most common causes of a gurgling toilet is a blockage in the drain line. This can happen due to excess toilet paper, undisposable items in the toilet, or accumulated waste. When water and air can’t move freely through the pipes, pressure builds up and pushes air up through the bowl, causing that distinctive gurgling sound. Using a suction cup can clear small blockages, but persistent problems may require a plumber with a drain probe or power washing equipment. Clogged Vent Every plumbing fixture has a ...

Why You Should Flush Your Water Heater

Image
 Most homeowners don't give their water heater much thought until it stops working. It's one of those essential appliances that quietly goes about its business in the background, providing hot water for showers, dishes, and laundry. But like any hard-working appliance, it needs a little maintenance to keep it running efficiently. Sediment Buildup Affects Efficiency Minerals such as calcium and magnesium gradually accumulate at the bottom of your water heater’s tank, especially if you live in an area with hard water. This sediment layer creates a barrier between the burner and the water, causing the heater to use more energy to heat the water effectively. As a result, your energy consumption and utility bills increase. By flushing the tank, you eliminate this buildup, helping your water heater operate more efficiently and warm water more quickly. Helps Your Water Heater Last Longer A neglected water heater is more likely to break down prematurely. Accumulated sediment not only r...

How to repair a toilet that does not flush

Image
  Does your toilet refuses to flush? Don't worry: there are several common reasons why your toilet won't flush and most of them have a simple solution. In this guide, we will help you diagnose the problem and give you the steps you need to take to get your toilet running again. The toilet is clogged This is one of the most common reasons why the toilet does not flush, even if the clog is not immediately visible. Non-flushable objects, such as wipes, can clog the sewer line and partial clogs further down the line can weaken the flush. How to solve the problem: Use a plunger: A flange plunger is the best solution to create a good seal in the toilet bowl. Try a toilet cochlea: If the plunger does not work, a cochlea can help loosen deep blockages. Hot water method: Turn off the water supply, flush and add hot (not boiling) water to the bowl. If none of these solutions work, consider professional drain cleaning. Check the toilet handle and chain If the handle does not start the flu...

Our guide to repairing and replacing water pipes and valves

Image
 Understanding damage to water pipes and valves Common causes of damage include, but are not limited to, natural wear and tear, corrosion, external physical damage and temperature fluctuations. Over time, water pipes and valves can deteriorate due to the constant flow of water. This can cause cracks, leaks and other problems. Water mains and valves can corrode due to the presence of minerals in the water, such as chlorine and sulphate. Water mains and valves can be damaged by external forces, such as construction, excavation or accidents. Water pipes and valves can expand and contract due to temperature changes. This can stress pipes and valves, causing cracks and leaks. The consequences of a damaged water main and valve include, but are not limited to, health risks, property damage, increased bills and environmental impact.   Damaged mains and valves can cause water contamination, posing serious health risks. Contaminated water can contain bacteria, viruses and other ha...

WHY RELY ON A LICENSED PLUMBER?

Image
 If you have a small toilet clog small toilet clog or a leak from your shower head, you can always call your neighbour, but will he be able to solve the problem properly? What if the shower head is screwed on too tightly and a pipe bends? All you are left with is a broken pipe and a sorry neighbour. Although taking measurements is one way to avoid losing money, you may end up spending more if your do-it-yourself method goes wrong. Here are three important reasons why you should rely on a licensed plumber: Passed a background check Plumbers must pass a background check before they are qualified and receive a licence. Before letting the plumber into your home, ask to see his licence.  He has received proper training Licensed plumbers must undergo extensive training before they are considered professionals. They study plumbing materials, useful tools and a variety of systems, including drain, water, sewer and gas lines. To be an efficient plumber, you need to be well-trained to u...

How to replace the toilet flush

Image
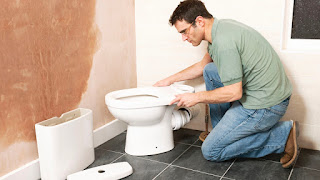
  Replacing the toilet flush can be a crucial part of replacing a toilet, especially if the fittings and fixtures are very old or deteriorated. This can certainly be the case if the pipes are very old or compromised for some reason. Most of them are made of PVC pipes, a very durable form of plastic that has been used for plumbing for many years. However, it is not indestructible and must be replaced for various reasons. Some people move the position of the toilet and use a staggered flush, or it can be damaged when removing the toilet. Here you will find the information you need to carry out the project. Removing the toilet Start by removing the toilet . Shut off the water supply and disconnect the hose from the tank. Flush the toilet to remove as much water as possible from the tank and stool. Use a plunger to remove any remaining water from the stool. Loosen and remove the nuts that secure the tank to the stool and lift the tank. Carefully lay the tank on a towel or blanket. Next...

Common signs that it's time to replace your toilet

Image
 Problems with your toilet can be frustrating and discouraging, especially if you don't have the tools to fix it. How can you tell if your toilet is beyond repair and needs to be replaced ? Our guide will save you time (and water) and give you important clues that it might be time to say goodbye to your beloved toilet. You can rely on us when it comes to your toilet: repair, installation, maintenance and unclogging.  How old is your toilet? It's obvious that something old needs replacing, but some people don't realise just how old their toilet is. On average, a toilet can be up to 50 years old. However, that doesn't mean you should keep your 49-year-old toilet for a few more years. Older toilets are often inefficient. If your toilet is 25 years old, you should consider switching to a newer toilet to save water and money.  Cracks in the tank Cracks are not always easily visible to the human eye. A common sign of a crack is when you notice puddles at the bottom of the t...

Installation of a drain pipe for the kitchen sink with drain in the floor

Image
  When installing a drain pipe for a kitchen sink along with the drain attachment in the floor, you need to be able to assemble the drain and the parts together. To do this, you will need to attach the drain to the trap under the sink where it drops into the floor. To do this, you will need to apply putty and insert the drain into the bottom of the sink, attach the end piece, and then install the tee onto the bowl. Installing the sink drain is not too difficult, and you should be able to complete this job in a weekend if you follow some simple instructions. Adding the sink drains Start the installation by inserting the drain strainer into the bottom of the metal sink. Add the two washers that came with the drain strainer kit to the bottom of the drain strainer, then add the nut to hold it in place. Apply a small rim of putty to the strainer, then press it into the hole in the sink. You may also decide not to install the washers before installing the strainer, but instead screw the...